There a couple of android tutorials floating around using eclipse and or ant but I my preferred tools are Intellij and Maven. This how I got started on my android development..
Download the JDK and run the setup.
Download the Android SDK and install/unzip to a desired location.
Download IntelliJ version 10.5 and run the setup.
Download Maven zip File and unzip to a desired location.
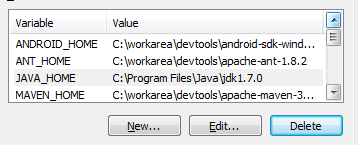
Setup some environment variables on your machine.
Set JAVA_HOME environment variable to where the JDK is installed.
Set ANDROID_HOME environment variable to where you’ve installed android
Set MAVEN_HOME environment variable to where maven is located.
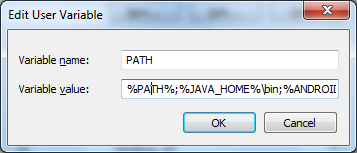
Update your existing PATH variable to include the following (%JAVA_HOME%\bin , %ANDROID_HOME% , %MAVEN_HOME%\bin – NOTE: No bin directory for ANDROID_HOME )
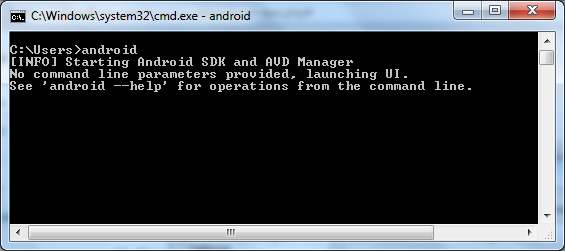
Launch a CMD prompt and type android to check that it launches correctly (if not, double-check you’ve correctly setup ANDROID_HOME and updated your PATH variable correctly)
If all goes well, you should see the android avd and sdk manager being launched.
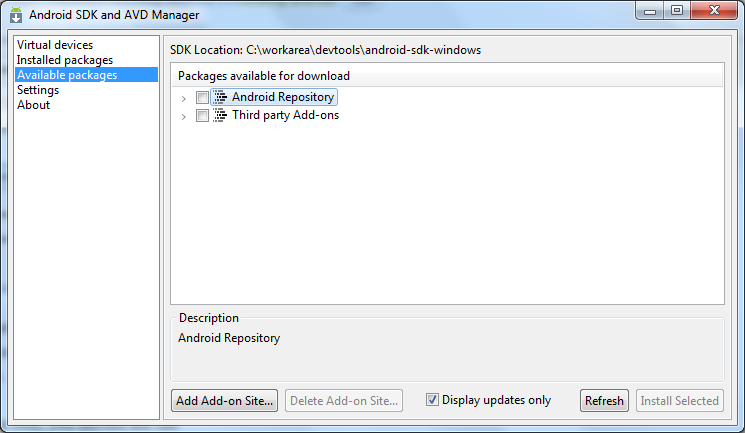
This tool is used to download the Android SDK platform for different versions and also to create virtual android devices with different capabilities, it allows you to test/deploy your code to the various virtual devices with different capabilities and get an idea how it will run.
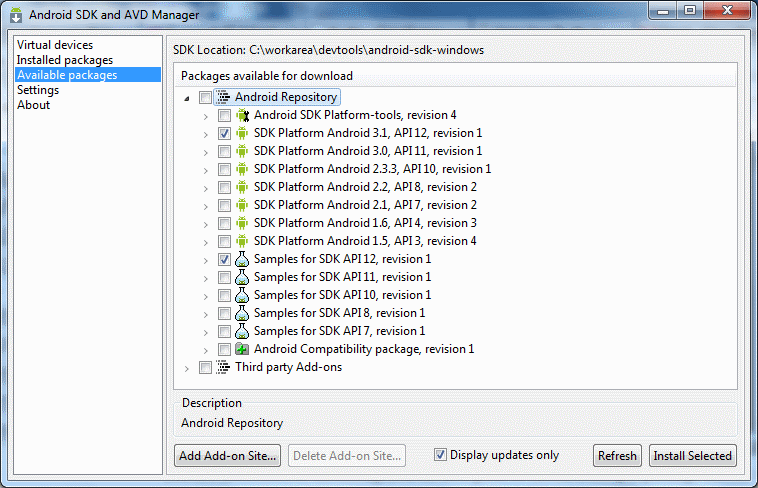
Click on “Available Packages” on the left and then expand the “Android Repository” on the right and tick the SDK platforms you are interested in installing, its also good idea to install a sample package aswell – this contains sample code to help you learn how to use the different Android API (the sample code folder will be located under %ANDROID_HOME%/samples).
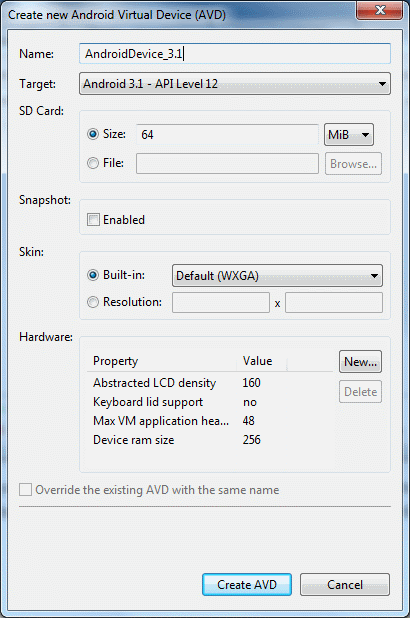
After you’ve installed the packages, you’ll want to create the virtual android device which is done by clicking on “Virtual Devices” on the left hand side and then click “New..” button.
Enter the name for your virtual device and from the Target select the API version (the target drop-down is populated by the SDK you’ve chosen to install in the previous step).
Well done! You now have the Android SDK installed and you’ve created a virtual device to test your code against.
In part 2 we have and example maven build for the hello world app.

Hi,
I have changed the Environment variable PATH to android sdk Now Eclipse is not running ERROR “there is no java virtual machine to run eclipse” Kindly guide.
Double check that you have JAVA_HOME environment variable defined, and that it is correctly pointing to where the JDK is installed. I would also advise you to double check your PATH variable to make sure it includes %JAVA_HOME%\bin . I found this stackoverflow link that may also help you